
Data Source: Micro Teleinfo v3.0 (France)
The Micro Teleinfo v3.0 is a small USB adapter that can read Teleinformation (TIC) data from French Linky Smart Meters.
It provides the TIC data via a serial interface over USB, which can then be processed. 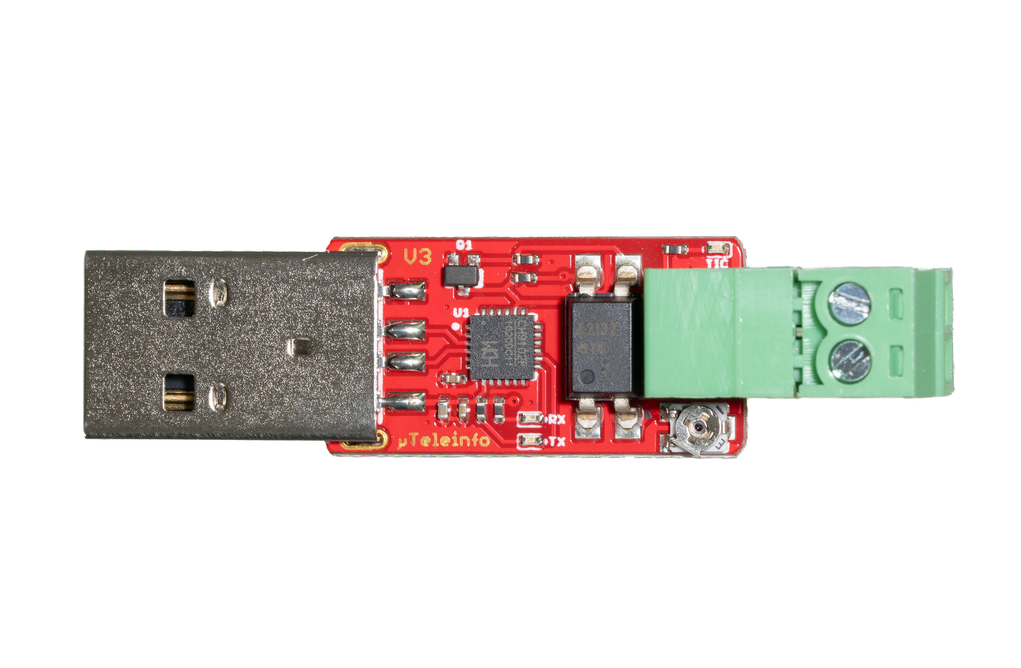
The Micro Teleinfo v3.0 connects to the Linky smart meter via two small cables that connect to the I1 and I2 interfaces of the meter. During development, a Raspberry Pi was used to plug in the Mirco Teleinfo v3.0 via USB. The serial interface is typically available at /dev/ttyACM0 on the Raspberry Pi.
To publish the TIC data to AIIDA via MQTT, the open-source teleinfo2mqtt image was used. This image reads the serial data from the Micro Teleinfo v3.0, sanitizes it, and publishes it to a specified MQTT topic.
Integration with AIIDA
Data Source Configuration
Connecting the Micro Teleinfo v3.0
As mentioned above, the Micro Teleinfo v3.0 must be connected to a system (e.g., Raspberry Pi) that supports USB and has a connection to the MQTT broker of the AIIDA instance to which the data should be sent.
The USB dongle must now be connected to the Linky smart meter via 2 small cables, like a telephone wire. As mentioned in the official GitHub documentation, the cables must then be connected to the smart meter I1 and I2 interface. Now a blue LED must flash very quickly which indicates a present teleinfo signal. In order to test this connection refer to the GitHub documentation mentioned above.
It is important to evaluate the mode in which the Linky smart meter is operating, as this affects the available data. There are two modes history and standard. In order to evaluate the current mode, the following command can be used to read data directly from the serial interface:
History mode
picocom -b 1200 -d 7 -p e -f n /dev/ttyACM0Standard mode
picocom -b 9600 -d 7 -p e -f n /dev/ttyACM0When data is arriving in the terminal, the meter is operating in the respective mode.
Setup in AIIDA
The same inputs have to be entered as described in the general data source documentation.
Connect with AIIDA
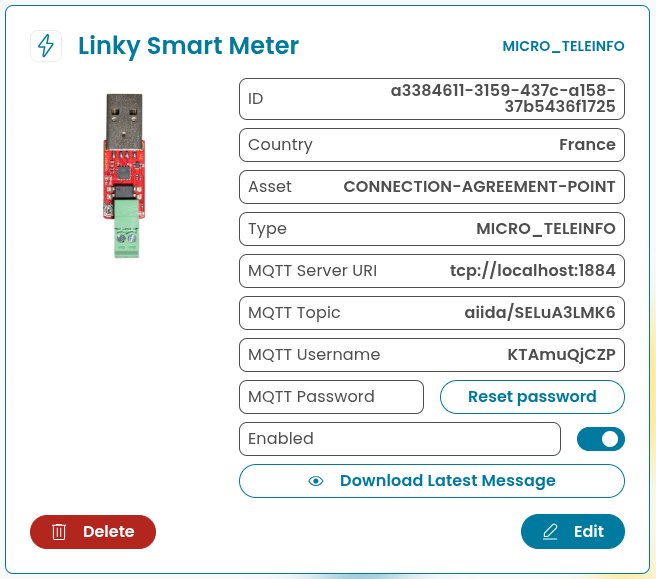
AIIDA provides the broker URL, topic, username, and password:
Configuring teleinfo2mqtt
The teleifno2mqtt image must be configured to connect to the Micro Teleinfo v3.0 and publish the data to the MQTT broker. An example .env configuration file looks as follows:
MQTT_BASE_TOPIC=REPLACE_ME
MQTT_URL=mqtt://REPLACE_ME
MQTT_USER=REPLACE_ME
MQTT_PASSWORD=REPLACE_ME
EMIT_INTERVAL=2
HASS_DISCOVERY=false
SERIAL=/dev/ttyACM0
TIC_MODE=history
TZ=Europe/Paris
Depending on the mode of the Linky smart meter, the TIC_MODE must be set to either history or standard. Depending on the device it is connected to, the SERIAL parameter might need to be adapted.
Lastly, the parameters with the REPLACE_ME values must be adapted to connect to the MQTT broker of the AIIDA instance. Here is an example configuration using the information from the screenshot above:
MQTT_BASE_TOPIC=aiida/SELuA3LMK6
MQTT_URL=mqtt://localhost:1884
MQTT_USER=KTAmuQjCZP
MQTT_PASSWORD=the_password_from_aiida_ui
EMIT_INTERVAL=2
HASS_DISCOVERY=false
SERIAL=/dev/ttyACM0
TIC_MODE=history
TZ=Europe/Paris
Additional things to consider
AIIDA will automatically determine in which mode the Linky smart meter is operating and parse the data accordingly. However, it is important to ensure that the TIC_MODE in the teleinfo2mqtt configuration matches the actual mode of the meter.
The main differences between the two modes is the available data points they provide. Linky smart meters operating in history mode provide way less data points compared to standard mode.